I am more active posting at http://jackpauhl.blogspot.com/ – Jack
My other blog
March 12, 2009Painting rooms 101
January 16, 2009Question:
I am a first time home owner and I plan on painting some rooms. I’d like help from you. Can you provide the dos and don’ts and gotcha’s I have to look out for.
1. What brand of paint should I go for? Big home improvement store or a local paint store?
2. What types of brushes will I need and how many?
3. What other tools should I arm myself with?
4. How many coats of paint is right to get the right shade?
thanks in advance
RC
Answer:
Hello Ryan,
1) There is no right answer for home improvement store paint or local paint store. The fact is this… each company makes one of two great products and everything else generally performs the same with the exception of the Zinsser Company. Zinsser makes all great products but more geared towards specific applications and a wide range of primers and sealers. There are good products sold at both places but few. You may be able to find the exact product at both places.
Paying $30-$40 or even $50 for a gallon of paint does not mean it is quality paint at all. You would be surprised. One of my favorite wall paints is sold at a box store and that same product is re-labeled and sold at a paint store, two separate prices. Obviously, I opt to save money.
2) You want one or two paint brushes for painting walls in bedrooms and around the interior of a home. A quality nylon/polyester blend is suitable for most acrylic paint. Choose a 2.5” angular sash brush and a 3” flat paint brush for cutting ceiling lines and longer runs like the top of baseboard. I suggest a brush without flagging. Choose a paint brush that is chisel tipped and tapered for a sharp, clean accurate cut.
3) You might want to purchase a 5-in-1 tool, it will come in handy throughout the year. You will need plastic or drop clothes or both, masking tape and rags.
The list:
Step ladder, deep-well roller pan, a 5 wire heavy gauge steel roller frame, an 2’ – 4’ extension pole will save you time and reduce fatigue and get you up to 9’ ceilings. Use a quality white woven roller cover. I recommend a 1/2” or 3/8” roller cover for smooth to lightly textured walls. A single edge break-away razor for scoring the masking tape prior to pulling the tape off the trim and molding. You may need a hammer to remove nails and some spackling or drywall mud and a knife to spread it with to repair any imperfections.
4) Most paint covers good in 2 coats so I would at least plan for that. The more intense wall colors often require 3-4 coats and sometimes more and some require a specific primer. Ask the representative at the place of purchase how many coats should the paint cover in.
Do not purchase cheap inexpensive roller covers, expect to pay close to $5 for one. Almost all roller covers shed fibers but the white woven covers shed the least if at all. Purchase a brush that will last throughout the years. Take care of it. A quality brush will save you time and make painting a whole lot easier.
Jack
Painting walls Red
January 16, 2009|
Painting walls red is the most difficult range of color to get nice solid coverage. Here are a few painting tips on how to get the best solid coverage when painting shades of red. |
First, the quality of paint has little to do with coverage when it comes to painting red. The term ‘quality’ and ‘professional’ are two loosely used words in this industry. It would be foolish of me to tell you to go out and buy a quality paint because what defines quality?
Do you think you are going to pick up two gallons of paint at the paint store and compare labels and make a decision? No, you most likely wont and good luck having the store representative tell you why a particular paint is better than another.
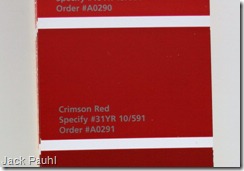
Second, we want to take a look at the paint chip and determine if your particular color requires a tinted primer to be applied to the walls first. Often a shade of gray primer is required under many shades of red.
Hue: The color family
LRV: The lightness or darkness of the color. The higher the number the lighter the color.
Chroma: The intensity of a color. The higher the number, the more intense the color.
Here is a fair rule-of-thumb. A gray primer is likely recommended for any Chroma value over 450. An ICI Store representative can assist you with the shade of gray to use.
This is what you need
You want to use a quality white woven roller cover, not any yellow or green colored covers – generally speaking. Do not be afraid to spend $5 for a single cover. This is not an area to skimp on. White woven roller covers are white in color and are more tightly woven providing a smoother more solid finish. White woven covers generally shed the least if any at all so you should avoid getting fuzzies in the paint.
Use a 3/8” roller cover for smooth walls and a 1/2” cover for slightly textured surfaces.
DO NOT use Lambs wool roller covers for intense wall colors.
This is how I recommend painting red colors.
When you are ready to paint, do not cut or trim anything in first. Simply pull out a roller pan, fill it with red paint and start rolling as tightly as you can to everything. If you use masking tape, then you should roll very close to everything. You may even want to roll horizontally near the ceiling to get closer. Allow the first rolled coat to dry before you cut or trim it in.
Now that your first coat of red is dry, you can start cutting-in the areas you were not able to get with a roller. Allow to dry.
For your second coat, you want to cut-in first and allow it to dry before you roll the second coat.
If your red requires a third coat (likely) then again, wait until the walls are dry, and start painting the edges first and then roll.
Some paints will allow you to backroll and others will not. Back rolling is best described by rolling an area and before you get too far down the wall, you go back to where you started and lightly re-roll that area without adding more paint to the wall. The trick is to allow the paint to set-up a bit and then lightly pass the roller cover over it again.
To determine if your paint will allow you to do this, simply roll a small area behind a door and wait a few minutes and then lightly re-roll it. If the area looks worst than before you backrolled, then your paint is best left rolled and left to dry. Meaning, don’t go back over it until its dry.
More painting tips & techniques on my other site.
Painting Kitchen Cabinets
January 16, 2009Berger’s Paints & Finishes
January 14, 2009 I snapped this photo a few years back at the Cleveland Zoo. Click for larger view.
Coming in January…
December 21, 2008
Painting over wallpaper Including how to prepare the paper for paint, fixing lapped seams, how to repair loose paper, which products to use. |

Painting Popcorn Ceilings Which roller cover to use, which paints work best -spatter less and cover better, what brush to use, dealing with irregular ceiling-line edges and how to clean them up. |
Patching Knock-down textures
How to make patches on knock-down so they match – replicating the texture around the patch -the simple and effective way utilizing a product that has nothing to do with paint. You won’t even know where the patch was when you are done! Don’t miss this one!
And so much more…
Coming in February: Repositioning the Standards
Searching Jack Pauhl
December 20, 2008
You can Google the name jackpauhl with (no spaces) for a more refined search of the topics on this blog and those I’ve posted on painters forums.
NOTE: If your Search results return 3 pages – go to the last page and click ‘repeat the search with the omitted results’ to get a full listing.
I’ve been posting for years so there are tons of results to go through.
You can type jackpauhl+radius 360 for example to read on that product or jackpauhl+whatever or try this link.
Below is the Topic List for 2007
October (37)
Dialing in HVLP
Weight Loss
Ext. SuperPaint Woes
Rolling Techniques
ICI Sanding Sealer
Cutting 8′ vs. 16′
Be faster cutting ceilings
Corrective Finishes
Wooster Polar Bear
Poor mans cover keeper
When touchups go bad
HVLP Transfer Efficiency
Factory primer fails brickmold
Full Sheen Ahead
Duration Home
Duration Exterior
About MDF Trim
Nail Putty Problems
Caulk. The act of caulking
Behr Premium Flat
Wooster ProClassic Plus
Putty & Fillers
Racking Trim
Racking 5 1/2" Baseboard
Painting Cedar Shakes
Cover Keeper
Clean-n-Dip Review
Pole Sander Mod
HVLP Maintenance
Freehand 2 Wall Colors
Split Spindle System
Penetrol – Other uses
Rolling Eggshell Paints
iPhone on the job
Nice ceiling white
How to treat drywall
About Wall Primers II
August (8)
Stainable Wood Fillers
Stain TIP large areas
Stop hitting the ceiling
ICI Dulux Velvet Sheen
Paint Industry Manufacturers
Wash this flat
Zibra grip-n-glide
Busy Summer
May (4)
Ext. SuperPaint after 2 yrs.
Recent Project S/L 259
Archive Posts
Patching nail holes
April (52)
ProForm Compound Issue
Loading a brush
UPDATED K46 W 51 Epoxy
Brush Handle Mod
Flaxen vs. Oregon
Not so Fabulous
Testing Brushes
Brushes Closeup UPDATED
Sherwin Williams K46 W 51
Roller Cover Care
Sandpaper Time Saver
2007 Worst Product Nominee
ICI 1410 on Green Board
Setup doors to spray
Baluster Spray Rack
Spraying Trim & Doors
Wall Primers UPDATED
Radius 360º
DAP DryDex NEW
Synthetics with Oil
End cap trick
Zinsser Bulls Eye Odorless
Iridescent White Trim
Trimming Roller Covers
Rolling Duration Home
Light Stain on Poplar
Spraying Balusters Down
Recent Project S/L 17
Racking Baseboard
ICI Dulux 2007 Colors
Caulking Tips
Painting MDF
Stick to metal
Patches & wall textures
Painting Poplar
Wall Primers Tested
Not on this blog
Proven painting advice
Ask Jack!
Brushes Closeup
Where do you shop?
Pan vs. Bucket Rolling
Paint with a roller
Brush Hype!
Stain Masonite Doors
Disclaimer
Renovating a house
Priming Bare Wood
Roller Covers Explained
Select Roller Covers
Select Paint Brushes
Key to a good paint job
Common Painting Myths
December 19, 2008 When I first posted my painting videos online there were only two other videos online, today, there are countless videos and paint related articles online.
Its unfortunate there is so much misinformation at everyone’s fingertips online (some of those videos people post make me cringe) and much of what I read is that same misinformation republished even in trade magazines over and over, same boring virtually meaningless stuff. But if you think about it, many of the people writing are getting their information online rather than from experience.
If you are a professional painter like me then you too are probably familiar with the misinformation. You want information beyond your current knowledge both with product and with acquired skills. You want to seek out something new, something you don’t already know that can benefit your business. For those new to the painting business, misinformation might send those readers on a costly expense of learning the truth the hard way. This is where the information on this blog becomes such a huge resource of information. I didn’t find this information anywhere online, I write about my real in-the-field applications, methods, products and experience. The information here isn’t secondhand and copied from various unreliable sources. There is no ‘grapevine’ effect.
Here are just a few myths busted on painting. I will try to add to the list for those who write in asking about things they read online or elsewhere. You have every reason to question it and validate it.
1) An Illinois-based decorating company wrote along these lines: Without the correct brush, it won’t lay out a nice finish. This is not true at all. What he is trying to explain has little to do with the brush and more to do with product. I can provide you with an ultra smooth finish using a whisk brush that people use to sweep up into a dust pan.
2) The same guy recommends Ox-hair or hog-bristle China brushes for applying oil-based product, but he says they can’t take the abuse of waterbornes. This was true years and years ago (more than 10 years ago). Now synthetic brushes far outperform china when spreading not only vanishes, sanding sealers and polys but also oil-based paint and even primer. Some perform better with stains both oil-based and waterborne.
3) It is said that nylon is soft, allowing paint to lay down smoothly, and cleans up easily. He recommends nylon bristles for woodwork and other areas that require a smooth finish”. Nylon is recommended for applying clears or painting over highly textured surfaces. The term "nylon" doesn’t mean you get a smooth finish at all.
4) He goes on to say the down side to nylon bristles is clogging easily, especially when used with fast drying paints. He believes for this reason, many brushes contain a blend of nylon and polyester”. I never heard anything about nylon clogging up. This sounds like poor pre-prepping a brush and or brush-work-style or methods and or poor product. I have no idea what that statement means. I do know however that polyester was added to a nylon brush for firmness and bend recovery purposes which he mentioned later. Polyester is not the culprit of brush marks, its one of four other things, 1) tipping, 2) flagging 3) product, 4) application.
5) A manager from a Sherwin Williams store in MO says the brush size matters: he explains cutting in with a dark color against a hard surface usually requires the precise edge of a “thin” brush. Thin has nothing at all to do with sharpness and an ability to cut an edge but everything to do with tipping. A 5/8” brush can be just as sharp as a 15/16” brush. Cutting sharp edges are in fact done more easily with a wider brush due to its fingerprint and stance on the wall provides more stability vs a thin brush.
6) He goes on to say thicker brushes are recommended for cutting in between a heavily textured wall and ceiling. Not quite. A heavily textured wall requires two things, first a soft nylon only brush and 2) the thicker the better. A firm thick brush will do no good on a “heavily textured wall and ceiling”.
7) He adds, there are regular brushes that have flagged bristle which he explains will hold more paint than a tipped bristle but won’t cut as fine a line. There is no such thing as a “regular” brush and flagging and tipping has absolutely nothing to do with how much paint a brush can hold.
8) And as if that wasn’t bad enough he says the fuzzy endings of flagged brushes are also better at eliminating brush strokes than finely pointed, tipped brushes. Not true at all. Flagged bristles are notorious for leaving brush marks despite brush manufacturer’s efforts to reduce the amount of brush marks. Fine tipped bristle is anyone’s best chance with any product to achieve smooth finishes.
Load Balancing
December 13, 2008Years ago I conducted a study on how far various roller covers can carry a load of paint. You can see an example in the photo. I wanted to know how much more distance can I get out of all the 1/2" covers available to me and find the best one. Then I wanted to compare the 1/2" covers against 3/4" covers of the same brand to see how much more distance I can get using a 3/4" cover assuming a desired roller texture. The same study was conducted on brushes.
Load balancing is gauged on the capacity of the brush or roller and the amount of paint you load them with for optimum results. Each load (amount of paint) is predetermined before taking the load based on for example where it will be placed on the wall or trim.
Load Balancing is one of the more important aspects with efficient painting. It’s a combination between the right paint brush or roller and the amount of paint in which you load them and how it impacts performance more than anything else.
Load Balancing allows me to paint ridiculously fast because each (next move) or next load of paint is thought out. What this does is eliminates unnecessary brushwork and/or more effective results with each load of paint.
In the video where the side of the casing is painted in about 8 seconds, Load Balancing plays a huge role in allowing me to do that. 1) The brush needs to be capable of holding a load of paint to go the distance of 7’. 2) I also need to know how much paint I will need to travel 7’ and put that amount of paint on the brush.
Look for more on this topic soon along with video demonstrations. For now you can see more on this topic here.
